Window installation: what actually happens, start to finish
Window installation is less disruptive than most homeowners fear. For a typical DC, Maryland, or Virginia home, the full process runs about 4 to 6 weeks from order to install, the on-site work takes one to two days, and each opening takes roughly 45 to 90 minutes. The crew works room by room, so your house is never wide open to the weather. Knowing the timeline and the prep removes most of the anxiety.
If you've never had windows installed before, the nervous part isn't the price. It's the unknown. Strangers in your house. Holes in your exterior walls. A crew with crowbars working a few feet from your furniture. The fear that they'll find rot, that it'll rain, that something will go wrong and you won't know whether it's normal.
This guide walks the entire window installation process the way I'd want a family member to understand it before the crew shows up: what happens before install day, what happens on it, opening by opening, and what to check before you sign off. During 2.5 years selling for Renewal by Andersen I watched the installs my sales turned into, so the goal here is simple. By the time the truck pulls up, nothing about the day should surprise you.
The full window installation timeline, from order to install
The whole thing takes about 4 to 6 weeks for most DC/MD/VA homes, and the on-site install is the shortest part of it. The long stretch is the factory building your windows to your exact opening sizes. That's most of the wait, not the labor.
Here's the honest breakdown of what happens, and roughly how long each stage takes:
| Stage | What happens | Typical time |
|---|---|---|
| Measurement | Final, precise measurements of every opening | 1 day |
| Order placed | Specs locked, sizes sent to the manufacturer | Same day |
| Permit / HOA / historic review | Only if required by your jurisdiction or install type | 0 to 8 weeks |
| Factory build | Your windows are manufactured to your sizes | 3 to 5 weeks |
| Delivery + scheduling | Windows arrive, install day is booked | 3 to 7 days |
| Install day | Crew removes old units, sets new ones | 1 to 2 days |
| Walk-through + punch list | You inspect every window with the lead | Same day |
| Warranty paperwork | You file your documents; registration is optional with most brands | Same week, ideally |
The single biggest driver of your timeline is whether a permit or historic-district review is required, and whether your sizes are standard. A standard insert install in a non-historic neighborhood can be done in four weeks start to finish. A full-frame job in a DC historic district waiting on Historic Preservation Office sign-off can stretch past 12 weeks before anyone touches a window. I sold projects on both ends of that range.
One thing worth setting expectations on now: the factory build time is fixed. No installer can compress it. If a company promises windows in your house next week, they're either pulling from generic stock sizes (which rarely fit older homes well) or they're not telling you the truth. Custom-built windows for the irregular openings common in older DC row houses and MD colonials take weeks to manufacture, and that's a good thing, because it means they'll actually fit.
Insert vs. full-frame window installation: which one you're getting
The single biggest factor in how invasive your window installation feels is whether it's an insert (pocket) install or a full-frame install. Insert is faster, cleaner, and cheaper. Full-frame is more invasive and costs 25 to 40% more, but it's the only correct choice when the existing frame is compromised.
An insert install leaves your existing window frame and jamb in place. The crew removes only the old sashes and operating hardware, then fits a new, slightly smaller window unit into the existing opening. Your interior and exterior trim usually stays untouched. It's the least disruptive option and the right call when your frames are sound.
A full-frame install strips everything out down to the rough opening, the framed hole in your wall. Sashes, jambs, sill, and often the interior and exterior trim all come out. The crew then installs a new complete window, flashes it, insulates around it, and rebuilds the trim. It's louder, dustier, and slower, but it's mandatory when there's rot, water damage, or you're changing the size or style of the window.
| Insert (pocket) | Full-frame | |
|---|---|---|
| What's removed | Sashes and hardware only | Everything to the rough opening |
| Trim disturbed | Usually no | Usually yes, inside and out |
| Time per opening | Faster (lower end of 45 to 90 min) | Slower (upper end, sometimes more) |
| Cost | Baseline | 25 to 40% more |
| Glass area | Slightly smaller (new frame inside old) | Maximized (full opening reused) |
| When it's right | Frames are sound and square | Rot, water damage, or size change |
For a fuller breakdown of how install type interacts with cost and material choice, see our first-time window replacement guide and the window materials guide.
How to prepare your home for window installation day
Good prep cuts the crew's time and protects your belongings. The night before, clear a generous working zone around every window, take down anything mounted near the frame, and plan where pets and small kids will be while doors are open.
Most crews will move furniture for you, but they typically charge for the time, and you'd rather they spend it installing windows. Doing the prep yourself is the cheapest way to keep the job efficient. Here's the checklist I give people:
- Clear the working zone. Move furniture well back from every window the crew is touching, several feet at minimum. Beds, dressers, couches, dining tables, anything within reach of the opening.
- Take down window treatments. Curtains, rods, blinds, shades, and any valances or hardware mounted on or near the frame. The crew won't reinstall these, and they can get damaged.
- Remove wall décor near the openings. Vibration from removal and fastening can knock pictures and shelves off nearby walls. Pull anything within a couple of feet.
- Protect the floors. Crews bring drop cloths, but laying down your own runners or old sheets along walkways adds a layer. Demolition produces grit that gets tracked.
- Clear the exterior path. Trim back bushes and move planters, hoses, and patio furniture away from the outside of each opening. The crew works from both sides.
- Plan for pets and kids. Doors stay open for hours and there are sharp tools and glass around. Crate pets somewhere quiet or board them for the day; keep kids out of the work rooms.
- Disable security sensors. If you have alarm contacts on the windows, tell your security company the install date so you're not triggering alerts all day.
- Note any alarm or lead-paint concerns. Homes built before 1978 are assumed to contain lead paint, so disturbing old painted sashes and trim falls under the EPA's Renovation, Repair and Painting (RRP) lead-safe containment rules. A reputable crew handles this, but flag it if you know your home predates 1978.
One more thing people forget: plan for the noise and the open doors affecting your climate. In a DC August or a January cold snap, the rooms being worked on will match the outdoor temperature for stretches of the day. The crew seals each opening before moving on, but expect the working rooms to be uncomfortable while they're active. Run your HVAC normally, just know it's fighting open walls for part of the day.
Start your measurement in 5 minutes
Snap a photo with your phone, get AI measurements and an honest price — no salesperson, no in-home pitch.
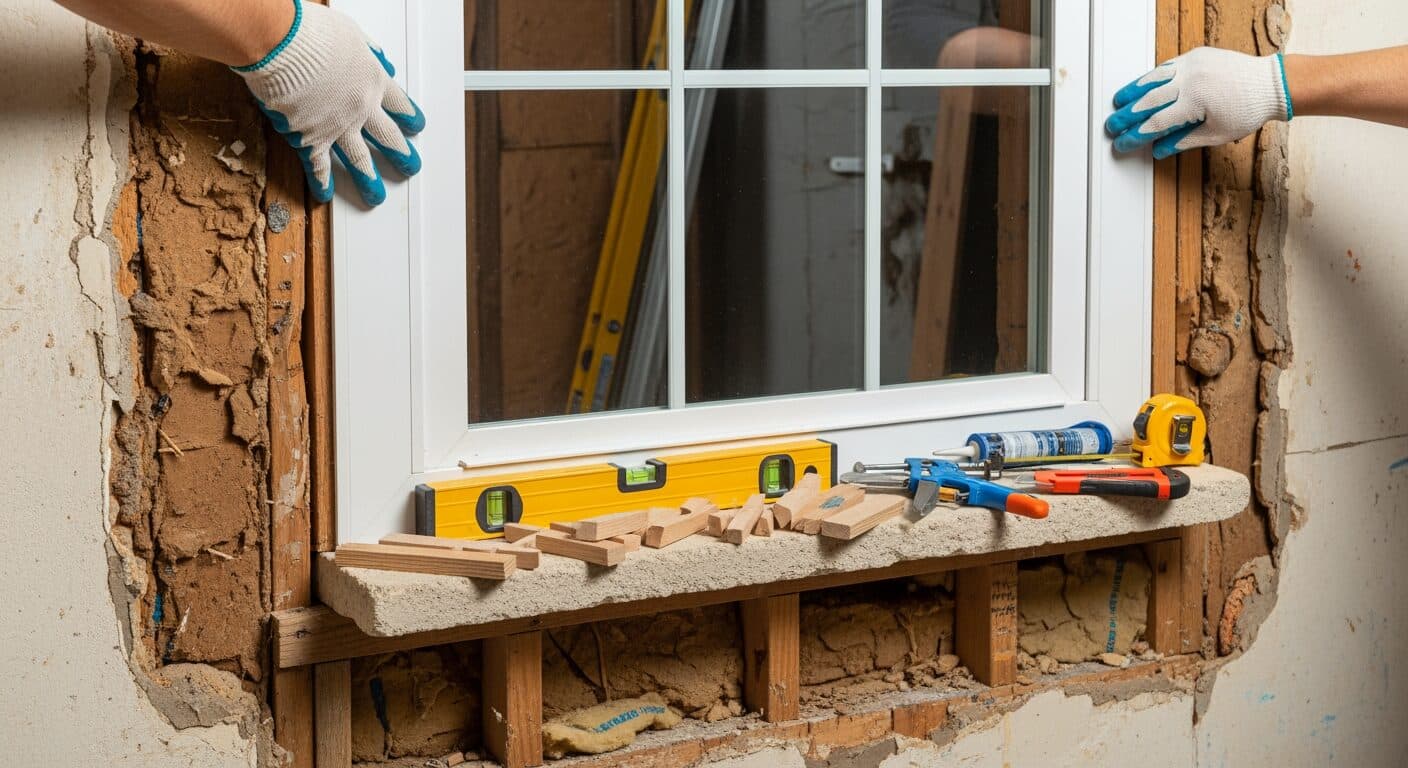
What the crew actually does at each opening
For each window, the crew runs the same five-step sequence: remove the old unit, inspect the opening, set and secure the new window, seal and trim it, then clean up. Each opening takes roughly 45 to 90 minutes, the range I watched crews hold across the jobs I sold, depending on size, install type, and what they find inside the wall.
Watching it once demystifies the whole job. Here's the sequence, opening by opening:
- Demo. The old window comes out. On an insert install, that's just the sashes and stops, and the jamb stays. On a full-frame install, the jamb, sill, and trim all come out down to the rough opening. This is the loudest part.
- Inspection. With the opening exposed, the crew checks for rot, water damage, mold, insect damage, or an opening that isn't square. This is where hidden problems surface. On full-frame jobs especially, budget a contingency over your quote for surprises the crew couldn't see until the wall was open. Figure roughly [data pending: full-frame surprise overage percentage] as a cushion.
- Set and secure. The new unit goes in. The crew shims it level, plumb, and square, then fastens it to the framing. Getting it square matters more than anything, because a window that isn't square won't operate smoothly and won't seal evenly.
- Insulate and flash. Low-expansion foam or insulation fills the gap around the perimeter. On a full-frame install, the crew adds flashing to shed water away from the opening. This step is what determines whether the window leaks in five years, and it's invisible once the trim goes on, which is exactly why a good installer matters more than the brand.
- Trim and seal. Interior and exterior trim is installed or replaced, and the exterior is caulked. On inserts, this is light. On full-frame, it's a rebuild.
- Clean up per opening. Old materials are hauled out, the floor around the opening is vacuumed, and the crew moves to the next window.
The reason the crew works one or two openings at a time, rather than ripping out every window at once, is weather and security. Your house is never fully open. Even on a 10-window job, only one or two openings are exposed at any moment.
What you'll see vary opening to opening is time. A small, square bathroom window on an insert install might take 30 to 40 minutes. A large picture window, a bay unit, or any full-frame opening with surprises behind the trim can run well past 90 minutes. The 45 to 90 minute figure is an average, not a promise on every opening.
What can go wrong, and how normal it is
- Rotted framing. The most common surprise, especially on wood windows in pre-1980 homes and on south- and west-facing walls that take the most sun and rain. It adds time and cost (figure [data pending: rot remediation cost per opening] per affected opening), but it's better found now than left behind a new window.
- Out-of-square openings. Old houses settle. The crew shims and adjusts for this, which is normal. A severely racked opening can need framing work.
- Wrong size. Rare, but real. The factory builds to the measurements taken at your home. If a unit is off by more than about 1/4", it goes back for a remake, a multi-week delay on that one opening while the rest of the job proceeds. I saw a handful of these in my selling years, and the remake always hurt more than the measure visit that would have prevented it.
- Color or finish mismatch. Occasionally an exterior cap or trim piece doesn't quite match the sample. It's usually subtle, but it's the kind of thing to catch during the walk-through rather than after the crew leaves.
For a wider look at what can go wrong with windows and how to tell a repair problem from a replacement one, see the window problems hub.
Permits, HOA, and historic districts in DC, MD, and VA
Whether you need a permit depends mostly on your jurisdiction and whether the job is insert or full-frame. Insert installs frequently need no permit; full-frame work often does. Historic districts add a separate layer of review on top of any permit, and that's where DC/MD/VA timelines stretch the most.
This is the part of window installation that catches homeowners off guard, because it has nothing to do with the windows themselves. It's about where you live. The rules vary by jurisdiction, so treat the below as the regional pattern, and confirm specifics with your local permitting office before you assume.
Washington, D.C.
Most straightforward window replacements in DC don't require a permit. The exception that matters: if your home is in one of DC's historic districts (Georgetown, Capitol Hill, and parts of Logan Circle and Dupont Circle among them), the work requires Historic Preservation Office (HPO) approval, which can add several weeks to your timeline. In HPO districts, vinyl windows are generally not approved; the office typically requires wood or an approved aluminum-clad or fiberglass product that matches the historic character. If you're in a row house inside a historic district, assume review is part of your timeline and start it early.
Maryland
Permitting varies by county. In Montgomery County, full-frame replacement generally requires a permit, while a like-for-like insert replacement generally does not. Other counties set their own thresholds, so confirm with your county's permitting office. Historic overlays (the Annapolis Historic District is the most prominent) add their own review regardless of install type. [data pending: Montgomery County window permit fee and processing time]
Virginia
Permitting also varies by county. In Fairfax County, full-frame window work generally requires a permit; insert replacements often do not. Old Town Alexandria sits under its own historic overlay (the Board of Architectural Review), which reviews exterior changes including windows on contributing structures. As in DC and MD, confirm the current rule with your locality before you assume insert work is permit-free. [data pending: Fairfax County window permit fee and processing time]
HOA approval
Separate from any government permit, many DC/MD/VA neighborhoods have homeowners associations that require architectural-review approval before you change exterior windows, particularly the color, grille pattern, or material. HOA review runs on its own calendar, often a monthly board meeting, so factor it in early. An HOA can't usually stop you from replacing windows, but it can dictate that the replacements match the neighborhood's approved appearance.
The practical takeaway: permits and reviews are a scheduling issue, not a quality issue, but they're the most common reason a window installation timeline blows past the four-week ideal. Find out which apply to you before you order, not after.
The walk-through section is where most homeowners either protect themselves or quietly give up their leverage, so it's worth slowing down on.
The walk-through and punch list: how to sign off correctly
Before the crew leaves, walk every single window with the lead installer and operate it yourself. Anything that isn't right, whether a sticky sash, a gap in the caulk, a scuffed frame, or a lock that doesn't catch, goes on a written punch list before you sign off. This is your leverage, and it largely disappears once the crew drives away.
This is the most important 20 minutes of the entire window installation, and it's the step nervous homeowners most often rush because they feel awkward scrutinizing someone's work while they stand there. Don't. A professional crew expects the walk-through. Here's exactly what to check, window by window:
- Operate every sash. Open and close it fully. It should glide, latch, and tilt (if it tilts) without forcing. Stiffness now becomes a service call later.
- Check every lock. Engage and disengage each lock. It should seat firmly without you having to push or lift the sash into place.
- Inspect every trim joint. Look at where the trim meets the wall and where pieces meet each other. Gaps, nail pops, and rough cuts should be noted.
- Look at the caulk lines. Exterior caulk should be continuous and smooth, with no gaps. This is your weather seal.
- Check the glass. Look for scratches, chips, or a cracked seal. Look at the glass coating in daylight for an even appearance.
- Confirm the screens. Make sure every operating window has its screen and that the screens fit and latch.
- Look for damage to your home. Walls, floors, and exterior siding around each opening should be free of new damage from the work.
Anything that's off goes on a written punch list, with the company's commitment for how fast they'll fix it. Punch-list items typically get addressed within a month. Get that in writing, a date or a window, not a verbal "we'll take care of it." Don't sign a completion document or release final payment until the list exists and you're comfortable with it.
Warranty registration: what it actually does (and doesn't)
After the install, deal with the warranty paperwork, and know what it really hinges on. Registration is typically optional rather than a coverage condition: Pella's warranty has no registration clause at all, Andersen treats registration as a convenience, and Simonton encourages it without requiring it. What actually conditions coverage is paying the contract in full and a proper installation.
The quiet failure mode here isn't a registration card left in a drawer. It's a seal that fails in year six and a homeowner who can't prove what was bought, when it went in, or that the contract was paid off. Keep the paper trail.
A few things to get straight while the paperwork is in front of you:
- Register anyway, the same week. Optional or not, registration puts your install date and product line on file with the manufacturer, which makes any future claim smoother.
- Keep your documents. Save the contract, the final invoice, the product order details (which line and glass package you got), and the registration confirmation together. A warranty claim usually requires proof of what you bought and when it was installed.
- Understand what's covered. "Lifetime" warranties usually distinguish between parts (the glass unit, the hardware) and labor (the cost to send someone to replace them). Many cover parts generously and labor for a much shorter window. Read which is which.
- Note the transfer terms. New windows with a transferable warranty are a real selling point if you ever list the home, so check whether the warranty transfers, how many times, and whether the new owner has to register the transfer within a set period.
The warranty is only ever as good as the company standing behind it. Within the same price tier, the brands differ less on glass and frame specs than on how readily they honor claims years later, and that's the part that's nearly invisible when you're shopping. If you've got a quote in hand and want a second read on the warranty language, our window consultant Zig has read the major brands' warranty terms and can flag the exclusions worth asking about.
How OneStep's process changes the timeline
OneStep keeps the same factory build and install stages every window installation requires, but compresses the front end. Measurement and quoting happen on your phone instead of across weeks of in-home appointments. The build and install times don't change; the scheduling overhead does.
Homeowners always treated my tape measure like it was the measurement. It wasn't; the walk with the tape was part of the pitch, numbers good enough to price the job and nothing more. After the contract was signed, a technician came back and took the final measure, and that was the number the factory built from. The rep's measuring act was never the one that mattered.
In a traditional process, a big chunk of the calendar is appointments: a sales rep visits to measure and quote, you wait for follow-ups, maybe a second tech comes for final measurements. OneStep replaces the sales visit with AI-guided phone-video measurement and an online 3D configurator that prices your actual openings without anyone coming to your house. You see itemized pricing up front, configure the windows you want, and we move to the precise final measurement and the factory order.
What doesn't change, and shouldn't, is the part that protects you. A precise final measurement still happens before the order is locked, because a window built to a wrong number doesn't fit no matter how fast you ordered it. The factory still takes its weeks to build to your sizes. The install crew still works opening by opening and still walks the punch list with you. The DTC model removes the sales friction, not the craftsmanship.
To start, you can run the measurement on your phone, preview and price windows on your actual home in the 3D configurator, or ask Zig a question in the chat before you commit to anything.
Frequently asked questions
How long does window installation take per window?
About 45 to 90 minutes per opening for most windows, the range I watched crews hold on the jobs I sold at Renewal by Andersen. Small, square insert installs can be quicker, while large units, bay or bow windows, and full-frame openings with hidden rot or out-of-square framing take longer. The number is an average across a job, not a guarantee on every single opening.
How long does the whole window installation process take from order to install?
Roughly 4 to 6 weeks for most DC, Maryland, and Virginia homes. Most of that is the factory building your windows to your exact sizes, typically 3 to 5 weeks. The on-site install itself is usually one to two days, though permits, HOA review, or historic-district approval can push the total past 12 weeks.
Do I need a permit to install replacement windows in DC, Maryland, or Virginia?
Usually only for full-frame replacements, since insert installs frequently don't require one. The rule varies by jurisdiction, and Montgomery County and Fairfax County, for example, generally require permits for full-frame work. Historic districts like Georgetown, Old Town Alexandria, and the Annapolis Historic District require separate approval regardless of install type.
What's the difference between insert and full-frame window installation?
Insert (pocket) installation keeps your existing frame and jamb and replaces only the sashes and hardware, so it's faster, cheaper, and used when the frame is sound. Full-frame installation strips everything out to the rough opening, runs about 25 to 40% more expensive, and is required when frames are rotted, water-damaged, or you're changing the window size.
How do I prepare my house for window installation day?
Clear furniture several feet back from every window, take down curtains, blinds, and nearby wall decor, lay down drop cloths, clear the exterior path, and keep pets and small children out of the work rooms. Doing the prep yourself keeps the crew efficient and protects your belongings.
What happens during the final walk-through?
You and the lead installer inspect every window together. You operate each sash, test every lock, check trim joints and caulk lines, look at the glass, and confirm screens are in place. Anything that isn't right goes on a written punch list that the company commits to fixing, typically within a month.
When do I need to register my window warranty?
Registration is typically optional rather than a coverage condition: Pella's warranty has no registration clause, Andersen treats it as a convenience, and Simonton encourages but does not require it. Coverage usually hinges on full payment and proper installation. Registering the same week is still smart, and keep the contract, invoice, and product details together in case you ever file a claim.
Will the crew leave my house open to the weather during installation?
No. The crew works one or two openings at a time and seals each one before moving on, so the house is never fully exposed. On a multi-window job, only one or two openings are open at any moment, which is also why a 10-window install can be completed in a day or two.
Next step
The fastest way to take the unknown out of your window installation is to see real numbers and a real timeline for your actual house, without a sales visit. Our 3D configurator pulls up your home, lets you choose styles and tiers, and gives you itemized pricing, so you walk into the project knowing exactly what's coming.
See it on your own house first
Preview a clean replacement on a photo of your actual window and get itemized pricing before you decide.
Or read up first: our full library of homeowner guides lives at /guides, the complete overview of replacement windows is at /window-replacement, and the person behind every page on this site is at /about/anthony-moorman.